


Today, almost everyone have smartphones and more
than half of smartphone users have better specification and feature. One of the many features why
people flocked for a branded smartphone is its camera features; perfect for
capturing moments, for selfies, groufies, and OOTD’s.
The question is, do we use it properly or we just rely on beauty apps?
PART 1: FROM GOOD PIC TO BETTER PHOTO

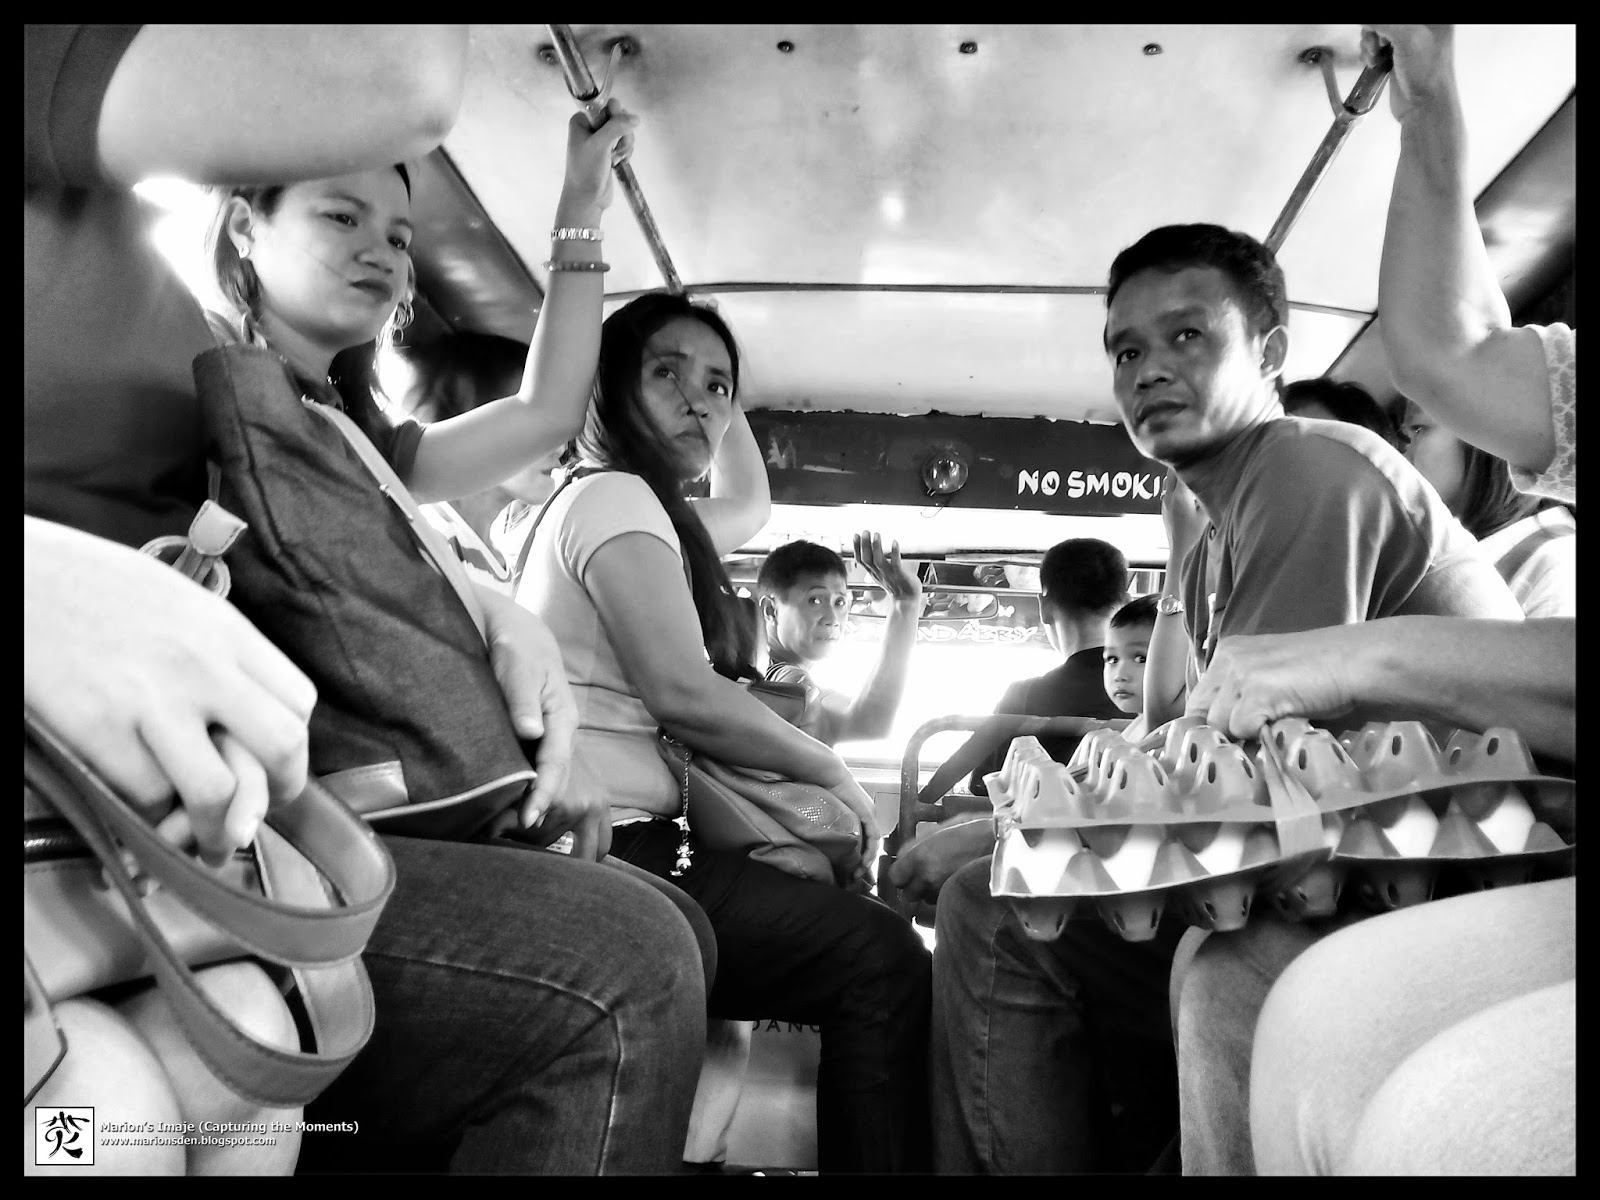
"In Line"
Smartphone camera users uses only or mostly 50%
of its features correctly and properly (no matter what kind of
Application or no Applications being used.) Many would say, “It does not matter as long
as we capture our moments.” Yup, what is important is capturing the moments but
what if we can capture moment’s and tell our stories way-way-way better than
just pointing and shooting? We paid a lot of money for its feature so why not
use it properly? Great Apps or no Apps, expensive- branded or cheap smart phones do not matter at all. Yes, it helps but what really matters is how the man/woman behind the camera captures an image.
PICTURE A

PICTURE B

I think everyone is with me that picture B is way
better than picture A even if the latter was shot from a DSLR camera. It’s not the camera;
it’s how we use the camera.
Anyone can take and make great photos and tell its stories
better. Yes, there are talented photographers but anyone can be good
photographers, it’s not innate, it can be learned.
How should we use our Smartphone camera regardless of having Apps or no Apps?


PART 2: TELLING STORIES THROUGH CAMERA PHONE
PHOTOGRAPHY
A:\> THE GEARS
I don't use Camera Apps most of the time, I only use Android's built-in camera, but it does not mean I don't have Camera Apps (not beauty apps) in my phone, I used Camera Burst. Obviously to take burst shots because my Android built-in cam can't do it the way I wanted to.
Here are my gears for my Smart Phone Photography

But there are two very important things you should bring always, your smart phone and its charger. Others are just optional gears: Tri-pod, monopod, power bank,
lens, extra memory card.
B:\> HOW TO USE THE CAMERA?
1. LEARN HOW TO FOCUS
Most people do is aim and click. This style does not
always get sharp images. Try tapping the screen anywhere you want to focus, the camera will focus on that part and it will meter the light automatically. Notice when you tap on the brighter spot,
the camera focuses on that part and makes the preview image becomes darker and
when you tap on the darker spot, the image becomes brighter. This is how our smart
phones measure the light to give us a better image.
2. NEVER ZOOM IN
This is the most common mistakes people do when
taking photos from their smart phones. They zoom in. Never use the digital zoom because it will reduce the quality of the image by cropping it. In layman’s
term, the photo will be pixelated.

From wide to zoom... I just cropped it so I can get closer to my subject
If you want to get closer, crop it during your post
process time. If you want to zoom in, buy an optical zoom lens. In this case it
will not decrease the quality of your image.
3. NEVER USE THE FLASH
As much a possible never use the built in flash
because it will make you look horrible. One portrait photographer said that if
you want to use flash to light up your subject, make sure the light source and the light it project is bigger than your subject’s head. Bigger
light can illuminate everything but since our smartphones have li’l light, so
never use it unless all possibilities are made to have light.
4. KEEP THE LENS CLEAN
Most of blurred photos are taken by camera phones with dirty lens. Wipe the lens with 100% cotton cloth to avoid scratching the glass.

5. USE THE HIGHEST RESOLUTION
When taking photos make sure to set up
the camera into its highest resolution. With this we can take sharper images
and we can artistically crop it without making any huge amount of
distorting/pixelating the image.

My Camera Phone has only 13MP resolution but am happy with it.

C:\> The 7TH SENSE
I call this the 7th sense because it is
the eye that sees Beauty or the artist eye.
1. LEARN HOW TO COMPOSE
A beautiful room is said to be beautiful when it is well arranged.
What makes a good photograph is when it is composed well. There are many types of compositions in photography but for starters I recommend these three basic
rules: The rule of thirds, Leading lines, the space, and filling the frame.
Applying these rules can give more life to your images.


Photo above: from the net - Rule of Thirds
Rule of Thirds

"Am here to Connect!"
Space + Thirds

"Safe Guard Masters"
One tip for capturing moments, especially when taking
photos including the background; avoid placing your subject in the center
because the viewers’ eyes automatically focus on the subject, not in the
entire picture.
An example of placing the subject dead center. Viewers eye are directed towards the center only. No one will notice the woman in the shadows.

Breaking the Rules is another approach in photography
but it is better to learn first the rules before breaking it.
I don't have the thirds here and I don't have any subject in the middle. To many this is not a good photograph but to me it is.

"Foreshadow"
It's being said that never put your subject in the center. But I did break that rule for this particular photo.

"Journey in the middle of nothingness"
2. FIND THE LIGHT
Always find the light. Having a good light can make your image interesting, clearer, sharper, and pleasing to the eyes.
3. BE ARTISTIC
Shoot from different perspective/angles. When you
keep on shooting straight shots it becomes flat and boring. Try Up high, Down
low, up close, and you’ll end up with interesting photos.
An example of down low shot photo. It gives another interesting point of view.

"Stare"
D:\> HOW TO TAKE A SHOT
1. GREATER THAN and LESS THAN
Most of us shoot like this. . .

We shoot at eye level but let us remember that what is nearer to the lens becomes larger in the
image. In taking group shots or solo shots, shooting at eye level
makes the subjects look not proportioned: having big heads and small feet. Try lowering the
camera to your chest if you don’t want to bend having an awkward position. (LOL! I do this position a lot during my works)
I took the photo below at my eye level. Notice the balance and angle of the subjects, not quite good.

"Hawak Kamay"
Photo below was taken at chest level.

If you want to have a high angle, make it above eye
level (greater than) or the opposite, lower angle (less than)
2. BE STILL
The more
steady your camera phone is when taking your shot the clearer your image will
be. This is important when shooting low lights without
a tripod (I recommend to use one) because our camera phones automatically adjust its shutter to longer
shutter speed to compensate low light situation.

One technique is to lean your camera phone to a stable solid object and
take a shot. I took the photo above by leaning on a wall near the traffic post. If you want to set a timer so you can’t interrupt the stability of
the camera, you may do so.
3. EXPERIMENT WITH WHITE BALANCE
White balance (WB) is the measure of your color
balance. According to Google, "is the process of removing unrealistic color casts, so that objects which appear white in person are rendered white in your photo." Most camera phones today WB can be
manually adjusted. Play and experiment with WB. Auto WB in smart phones today
is also okay.

4. ADJUST EXPOSURE
Some High End smartphones today have full manual
modes same with professional cameras but for those smartphone users that
doesn’t have full manual mode, like mine, we can still adjust our exposures by
adjusting the ISO settings and Exposure settings.

For iPhone cameras, they have manual exposure settings beside the focus point (little sun icon). The users can adjust simply by swiping on the screen up and down.
5. GO MACRO
Some Smart phones have macro feature. This is the
ability of a camera phone lens to take a closer shot of the object but is not
used regularly and properly. Try setting it up and discover the
beauty of getting closer, try macro photography!
Using my macro setting from my phone


Using macro setting with macro lens

6.SHOOT IN COLORS
Always shoot in colors even if you love black and
white. You can always make it black and white in your post processing tool but
you can’t make your image in color if you take it black and white from your
camera.
"Come in"
7. DON’T DELETE
Never delete a photo until you viewed it on your PC.
There are photos that seems awful from our phone screen but when seen
in the computer it doesn’t. Blurred images are also good images.
Photo below was taken with a 1.3MP basic phone

"Be Careful"
Photo below taken from my android phone

"Tipid"
E:\> POST
PROCESS IT
Nothing is wrong when we enhance our photos.
Remember, our smart phone cameras are very much limited compared to high end
professional cameras. So, better enhance it.
There is nothing wrong if we post process our photos to make it 200% beautiful.
There is nothing wrong if we post process our photos to make it 200% beautiful.

What I mentioned above are just the basics, the
fundamentals. How to capture better is gonna be your style, your
approach on how you combine and break the rules, how you see and feel the moment, how
you capture it and how you tell it to the world.
~ THANK YOU ~


0 Comments